How do I extend the ‘validity period of domain’ in Plesk?

Re: validity period of domain, validity period is prolonged, extend the validity period

If you get this message then do not worry about the expiry of your domain name or hosting account. This message relates to the period you applied when you added the domain name to your Plesk panel.

The messages usually contain:

  • validity period of domain
  • validity period is prolonged
  • extend the validity period

This problem occurs if you missed out Step 12 in “How to add a domain to multi-domain hosting“.

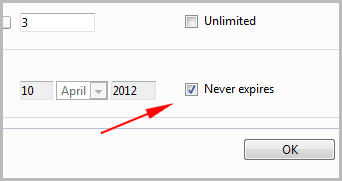
To resolve, simply log in to your Plesk control panel, select the appropriate domain name, go to Resource Usage and ensure that the “Expiration date” is set to “Never Expires“.

Plesk: AtMail search does not work

AtMailRe: Search doesn’t work in AtMail, AtMail search returns no results

AtMail is a great webmail application that has a high level of functionality, an attractive looking interface and many useful integrated features.

One of these feature includes a bug that causes the “Search” function to return no results for any search!

To fix it, you need SSH Root access to your dedicated server console. If you want to get down and dirty, edit the following two lines:

Change Line 364: $before = "$BeforeDay-$BeforeMonth-$BeforeYear";
Change Line 369: $after = "$AfterDay-$AfterMonth-$AfterYear";

Alternatively, run the following two SED commands and the lines containing the bugs will be automatically fixed.

# sed 's/20$BeforeYear/$BeforeYear/g' /var/www/atmail/search.php > /var/www/atmail/search.php.new
# sed 's/20$AfterYear/$AfterYear/g' /var/www/atmail/search.php.new > /var/www/atmail/search.php
# rm -f /var/www/atmail/search.php.new

Happy searching!

How to: Installing CA [root] Certificates

Install CA CertificatesRe: Installation of CA, Install SSL CA Certificates

If you are using a shared or managed hosting service (such as Plesk) then the installation of SSL certificates is straightforward and can be done through the control panel interface. However, when you need to install on a server level with no panel things are a little more involved.

To install certificate authority (CA) certs in your Centos server:

  • Copy the certificates to /etc/pki/tls/certs
  • Edit /etc/httpd/conf.d/ssl.conf
  • Add “SSLCACertificateFile /etc/pki/tls/certs/YourCAFile.crt”
  • Test with “service httpd configtest”

If all ok, “service httpd restart”

Plesk Migration Manager (PMM) Stalls at 50% Completion

Plesk Migration ManagerRe: Insufficient storage for Plesk  9.5.4 Migration Manager (even though there is)

If you are having problems using the Plesk Migration Manager, one of the first problems you need to solve is the insufficient space problem. There are many problems with the PMM but that’s another story, you’re probably here because you really need to get it working.

You may get a failed migration due to this issue, or a constant hang at 50% completion without any error.

Even though you get the opportunity to set a data dump location (default within /var) and you have likely carefully ensured that there is another psace storage on that device, what you don’t know is an intermediate storage space is also required in /usr/local/psa/PMM.

Luckily this problem is easily dealt with by creating a symbolic link for the PMM directory.

The examples below move the PMM directory to a secondary drive namely /backup.

1. Let’s create the new PMM directory on a drive with plenty of free space.

# mkdir /backup/PMM

2. Now we will copy the PMM directory and its contents to the new PMM directory whilst preserving the ownership and permissions.

# cp -Rp /usr/local/psa/PMM/* .

3. Set the current PMM directory aside

# mv /usr/local/psa/PMM /usr/local/psa/PMM.old

4. Now we create the symbolic link

# ln -s /backup/PMM /usr/local/psa/PMM

The PMM directory is now symbolically mapped to a drive with suffienct space for your migration to complete. You may need to abort any previous migrations and restart as often they do not restart once stopped due to an insufficient storage space problem.

See this entry on Parallels KB: http://forum.parallels.com/showthread.php?t=100327
Upgrade and Fix vulnerabilities in Plesk 9.5.4 for Linux

Re: Upgrade Plesk 9.5.4, Install micro-updates Plesk 9.5.x

If you are still running Linux Plesk 9.5.4 you may think that because 9.5.4 is the latest (and last) 9.5.x version that there are no new patches or upgrades available. If so, you are dangerously wrong.

Parallels regularly release “Micro Updates” which resolve recently discovered vulnerabilities, and there are plenty of them. The latest update is 9.5.4 MU 18.

You can find which version you are running like this:

# cat /root/.autoinstaller/microupdates.xml

You can see here that “patch version=18” which means micro updates up to  (MU) 18 are installed.

Upgrading to Plesk 9.5.4 and installing the Micro Updates

We recommend that you install any new micro updates as soon as possible, it takes only a few minutes and can be run from the command line:

/usr/local/psa/admin/sbin/autoinstaller –select-product-id plesk –select-release-current –reinstall-patch –install-component base

If you are not running Plesk 9.5.4, use the following command to upgrade to latest 9.5.4:

/usr/local/psa/admin/bin/autoinstaller –select-release-id=PLESK_9_5_4 –upgrade-installed-components –ignore-key-errors –notify-email=your@emailaddress.com

If you haven’t already, go to Parallels and subscribe for the panel update notifications:

http://kb.parallels.com/

For further information see Parallels KB Article http://kb.parallels.com/en/9294